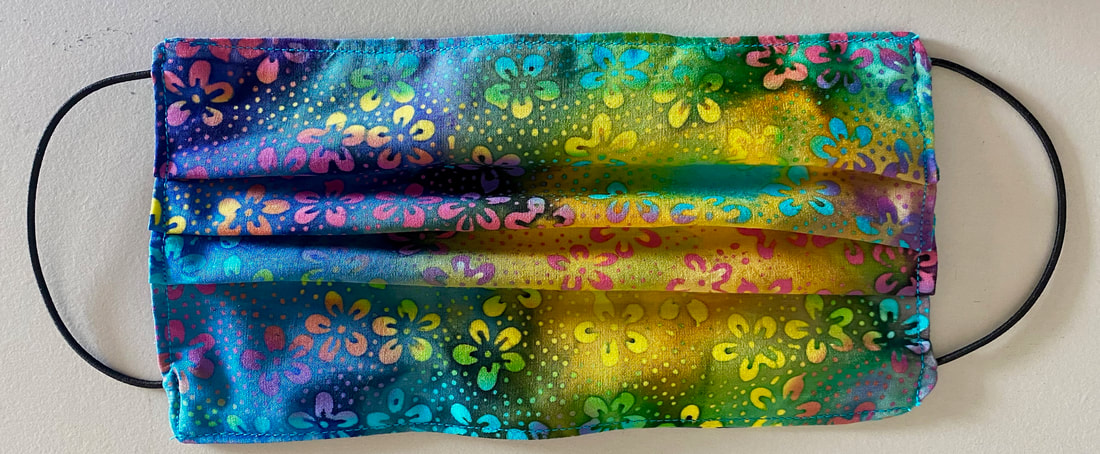
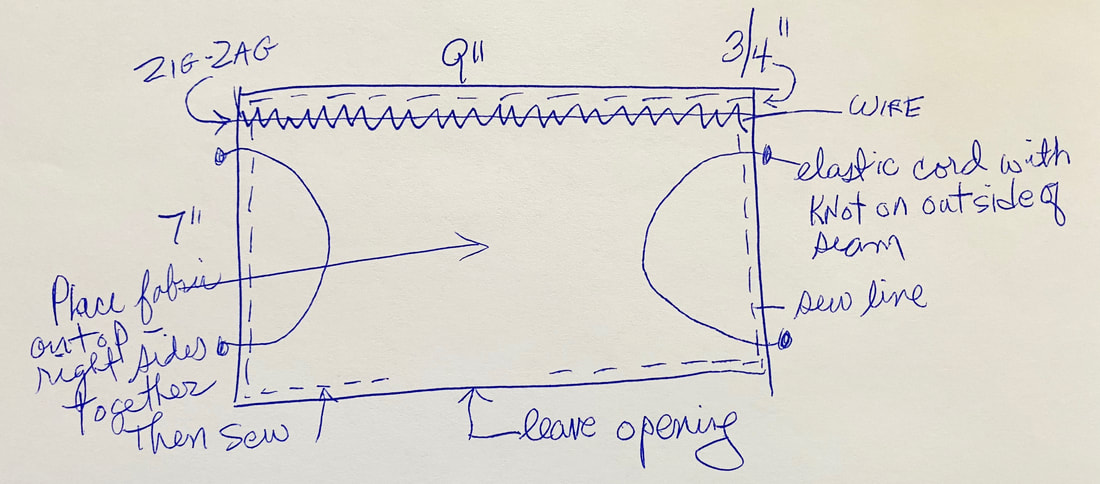
 Since most of us are house bound and wanting to do something positive for preventing the spread of the Coronavirus, I thought I'd spend my day making face masks. So here is the pattern I came up with. I'm now trying to find places who need these so I can donate my time and materials to make them. I need to do my part! Stay safe everyone! UPDATE: I will be donating some masks to a senior center in New Jersey. Seems these centers have NO protective equipment so are happy to receive anything. My friend also found a connection to a local hospital so I will be giving her masks to take there. There is also a website here in Colorado that has established connections to local hospitals (they use a different pattern) but I will also be making masks for them. https://operationwecansewit.com/ Also, I made one for my husband to wear to the grocery store and today, he did and got lots of compliments and questions like "Where did you buy that!" Now I'm thinking that supermarket checkers and stockers would also appreciate some masks. Free Face Mask Pattern IMPORTANT NOTE: Face masks made at home are not made of medical fabric. Home-made masks are made from tightly woven polyester fabrics and cannot protect the wearer from being infected from the COVID 19 virus. But these masks are better than no masks in a pandemic. Perhaps these home-made masks can be utilized by hospitals and senior care facilities as ways to prevent healthy people from spreading colds and flu while medical masks can be used by nurses and doctors. Before making these masks, find a place to donate them. That will save you time and materials if they are not needed. Directions Cut 2 pieces of cotton fabric to 9” x 7” Cut 1 piece of 22 Gauge wire to 11” (pipe cleaner will also work) Cut 2 pieces of 2mm round elastic cord (6.5" long for women, 7.5" long for men)
2 Comments
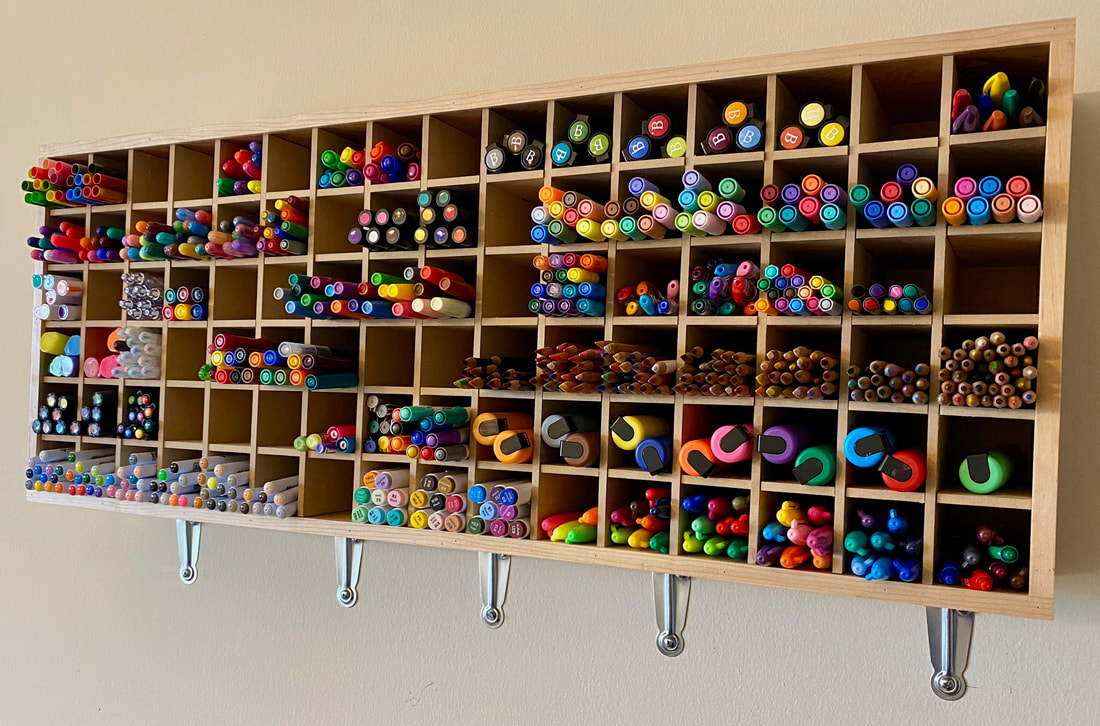 It's not often I get a gift that has meant so much to me as this one I received from my brother Greg.
I know that all my markers need to be stored horizontally but nothing I saw in the stores would hold as many markers/pens/pencils as I had. I was lamenting this to my sister-in-law who suggested I email my brother (who is a wonderful wood-worker) to see if he could make me something that would not only be practical, but become a work of art on my studio wall. Greg said "of course!" and sent me this fabulous wooden display unit that I now have on my wall. Easy access to everything I need and also a work of art. I smile every day as I see this above my desk. Getting a gift, made by hand, is something so special. In these uncertain times, perhaps this is something we can all do as we self-quarantine. 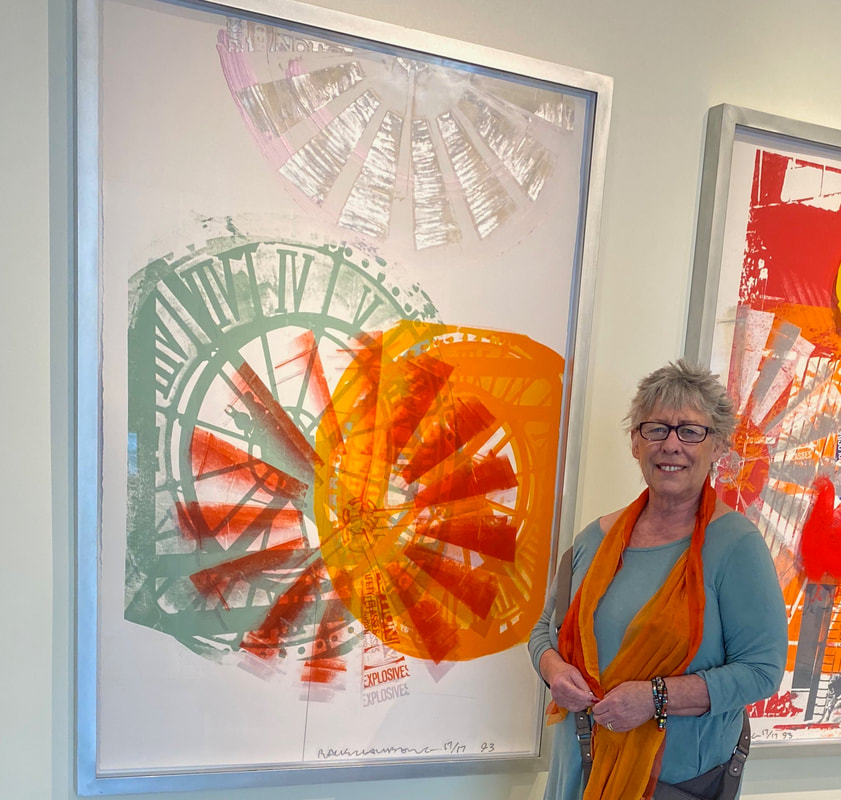 When I checked in for the Rauschenberg exhibit at the Museum of Outdoor Arts in Englewood, CO, the woman, looked at my outfit and said "You will be right at home!" I had no idea what she met until I came across these two large prints. And I thought I was the only artist that would pair these two colors! Wrong!
This exhibit shows 50 years of art from this influential artist and is fascinating. If you have a chance, go visit! you won't be disappointed. 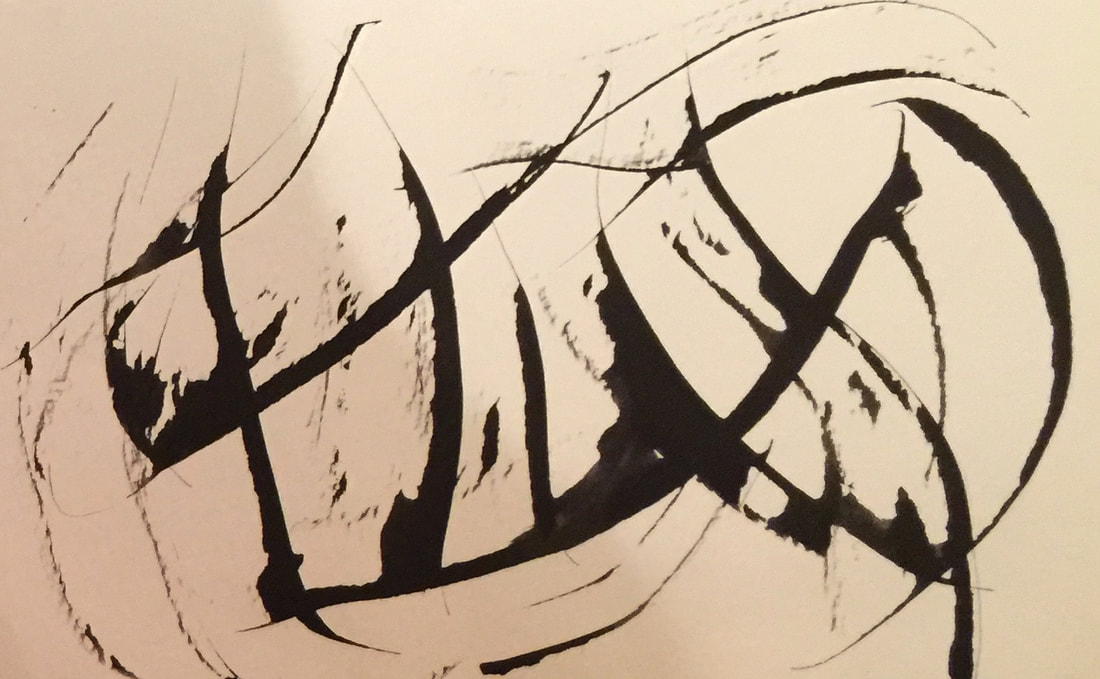 I love exploring mark-making.
To me, it shows the hand and gesture of the artist so when you view the art, you get a sense of what the artist was doing when she created it. But I also LOVE making marks with non-traditional implements. So when I discovered the "Cola Pen" I had to make some. It got it's name from using a Coca-Cola can as the metal base, but you could use any soda can as long as the metal is easy to cut with a scissor. Here's how to make your own. Cut the top and bottom off of a soda can. Cut the tube in half so you have a flat piece to work with. Cut a 2 " piece of the metal and wrap it around a flat stick (like a tongue depressor) leaving bout 1" of metal overlapping the top of the wooden stick. Secure with duct tape. Cut the top of the stick into aa triangle shape so the pen has a point at the top. Dip into ink and make marks! The image at the top shows the kind of marks I made with my Cola Pen. I love not having control and I love the random look. I hope you try it! There are many many YouTube videos showing you how to make your Cola Pens and each artist has their own method but here is a quick one that shows you the process. https://www.youtube.com/watch?v=h5OPuE2zlFI Explore! |